Helm with Minikube
Creating our Bobba-charts
As describe earlier Helm is composed of charts which can be download and configure easily. In our case for the purpose of learning Helm we’ll make our own charts.
Before beginning our journey into the world of chart of Helm. I highly suggest you to check the templating syntax of Helm
Creating our template for Minikube
Helm templates folder can contain many yaml files. In our project which are:
- bobba-vue
- bobba-api
We have 2 commons components which are:
- Deployment.yaml
- Service.yaml
Thus thanks to the templating system of Helm we could gather these common components together in 1 generic component.
The yaml file is available in the folder bobba-helm-chart/templates/deployment.yaml.
As these deployment are similar the technic is to create 4 distinct Values files.
- 2 for the bobba-api (1 for the production, 1 for the development)
- 2 for the bobba-vue 1 for the production, 1 for the development)
These values will be used by the deployment.yaml template file which will then be render by the tiller.
Thus we have a generic yaml file like below. Special case for either deployment case are handle by a conditonal if
# Deployment for the api
apiVersion: apps/v1
kind: Deployment
metadata:
  name:
  labels:
    helm.sh/chart:
    app:
    tier:
spec:
  replicas:
  selector:
    matchLabels:
      helm.sh/chart:
      app:
      tier:
  template:
    metadata:
      labels:
        helm.sh/chart:
        app:
        tier:
    spec:
      containers:
        - name:
          env:
          image: ":"
          imagePullPolicy:
          ports:
            - name: http
              containerPort:
              protocol: TCP
Our template is full of mustache templating. This is indeed due to the Go’s templating language which Helm is based on. In order for you to fully understand the template below is a list of directives that what we’d used for defining our template.
Variables
foo:
# This referer to the variables deployment.name which are in the values-{type}.yaml. We use the "." in order to precise the namespace e.g

# .Values represent the value file (values-{type}.yaml)

# .Values.deployment, "deployment" represent a value named "deployment" in our yaml file

# .Values.deployment.name, "name" represent a value named "name" which is in our yaml file but is a child of the value "deployment" which is it's parent
Include a partial templates
Sometimes it can be handful to include an other set of yaml file in order to make your deployment much more readable. You could consider this include as including a partial template into your main template file.
# In your partial template- name: DEPLOYMENT
  value: minikube```

> Note: You could use the keyword ```template```. However as per the Helm documentation is preferable to use the include keyword than the template.

> Per Helm's documentation: It is considered preferable to use include over template in Helm templates simply so that the output formatting can be handled better for YAML documents.

### Conditional

A condition could be useful for handling a special case e.g overriding the default Docker's image args for your Deployment object. This can be done like below

```yaml
# This mean, if the deployment.args variable exist then execute the condition
  # Do something
Whitespace
Yaml is kinda case sensitive. Thus whitespacing can be quite an issue. Thankfully Helm is providing a simple way of dealing with whitespace.
the - operator could be use in order to remove the whitespace. e.g
dish:
Pipes
Helm is also supporting a feature which is inherited by the Go templating system. This function is the pipe feature. This feature allow you to interpolate your values with several pipes operator. e.g you want to add quotes to your values.
This can be done like below
fname:
# This would output: fname: "marc"
Services
As we just see, the templating has basically the same format as the real deployment but instead of using a real values we’re using templating values. Well for the services this is the same ! It’s even more straightforward as it’s much more shorter.
Below is the service which you could also found in the folder bobba-helm-chart/templates/service.yaml
# Service configuration
apiVersion: v1
kind: Service
metadata:
  name:
  labels:
    helm.sh/chart:
    app.kubernetes.io/instance:
    app.kubernetes.io/managed-by:
spec:
  type:
  ports:
    - port:
      targetPort:
      protocol: TCP
      nodePort:
  selector:
    helm.sh/chart:
    app:
    tier:
All right now that we’ve create our yaml template file for both of the bobba-api & the bobba-vue project let’s test it.
Ingress
Configuring the ingress is also straightforward. Define an ingress.yaml in the templates folder and Helm will automatically use it. Our ingresss looks like that
```yamlapiVersion: extensions/v1beta1 kind: Ingress metadata: name: annotations: kubernetes.io/ingress.global-static-ip-name: spec: rules: - http: paths: - path: backend: serviceName: servicePort:
Notice the ```...```. We only want to launch our ingress when needed thus we have a flag in our Values files whenever we need to enable it or not.

## Testing

Helm is providing a command for you to test your configuration. This command will return errors if something is wrong with your configurations files. It'll also show you the entire rendered yaml files which are going to be send to the ```tiller```. Below is the command

```shell
helm install --debug --dry-run -f <path_to_values.yaml> <path_to_chart>

# In our example
helm install --debug --dry-run -f bobba-helm-chart/values-api.yaml ./bobba-helm-chart
Let’s explain this command
- helm install: will send your charts to the tiller for installation
- –debug –dry-run: will not installed but print the result of the charts
- -f
: allow you to select a different ```values``` file. (By default it use the ```values.yaml``` file) - ./bobba-helm-chart: the name of the chart
Installing the front
As you can see we’d just use the debug mode for running our chart. Installing is then no more simpler than running the command without using the --debug --dry-run command.
helm install -f <path_to_values.yaml> <charts>

# In our example
helm install -f bobba-helm-chart/values-front.yaml ./bobba-helm-chart
When the installation is successfull a sucessfull message will appear with the list of objects that has been deployed into Kubernetes as well with the release name. Below is a screenshot of what it could look like
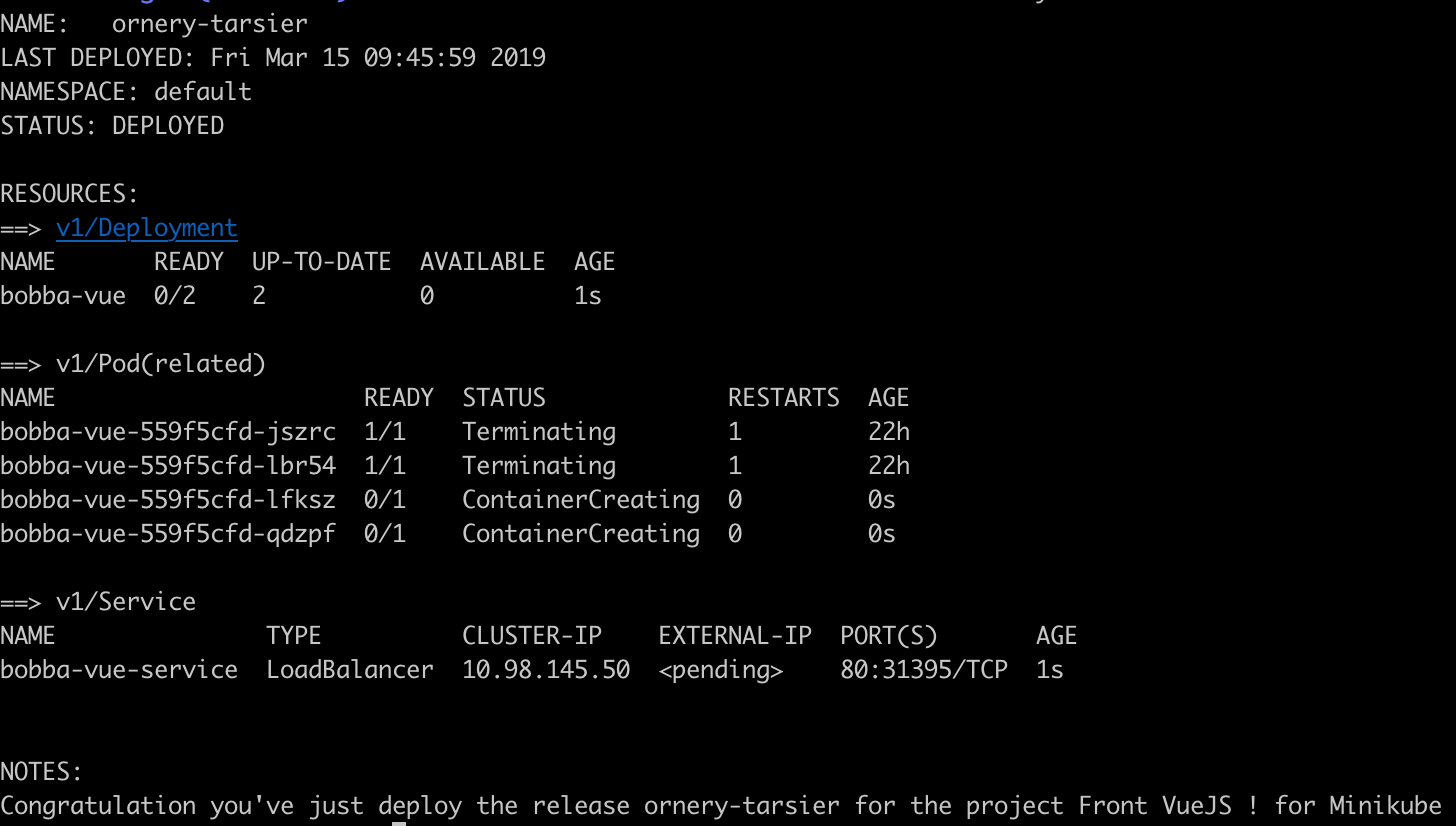
Helm deploying bobba-vue
Installing the back-end
Installing the back-end will be done later as we need a dependencies.